Siemens NX visualization provide few visualizing options for model rendering. Although before go through this article it’s advisable to get the basic idea of image rendering what factors important creating realistic render image.
NX has mainly two option in visualizing model parts.
True Shading – used to create basic renders
Advance Studio Display – allow the user to create more advance & realistic render images
Advance Studio
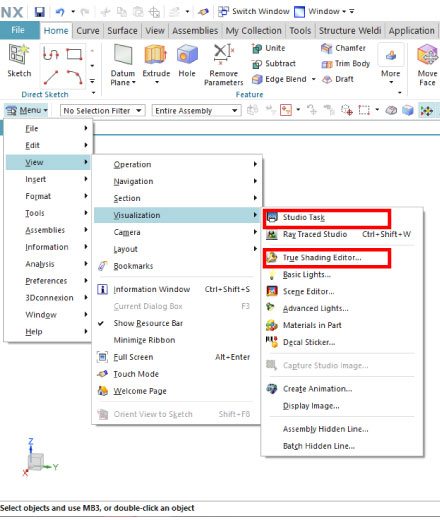
Open the Siemens NX and desired model that need to create render image. Then activate the “Studio Task” ( View – Visualization – Studio Task)
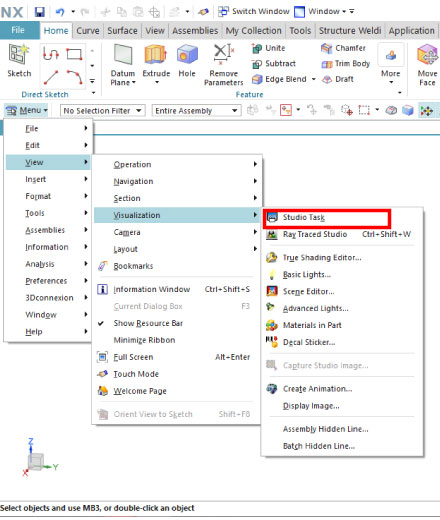
Once Studio Task activate, the environment change and true shading tool bar shown. While all modeling tool bar will disappear. This tool bar/true shading contain the all the features to setup/create photo realistic images.

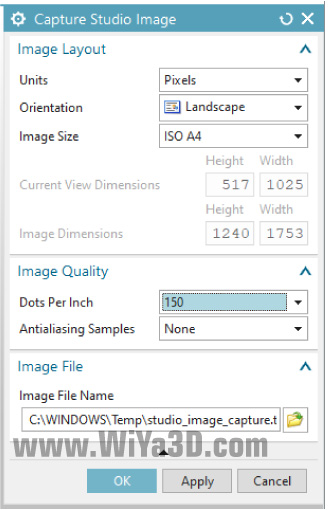
Capture Studio Image
This feature allows the user to capture the static image of the model part. Also allow user to make quality changes, name changes for the static image.
Face Edges
Face Edge feature help to turn on/off the edges/or line of shaded face of the model part.

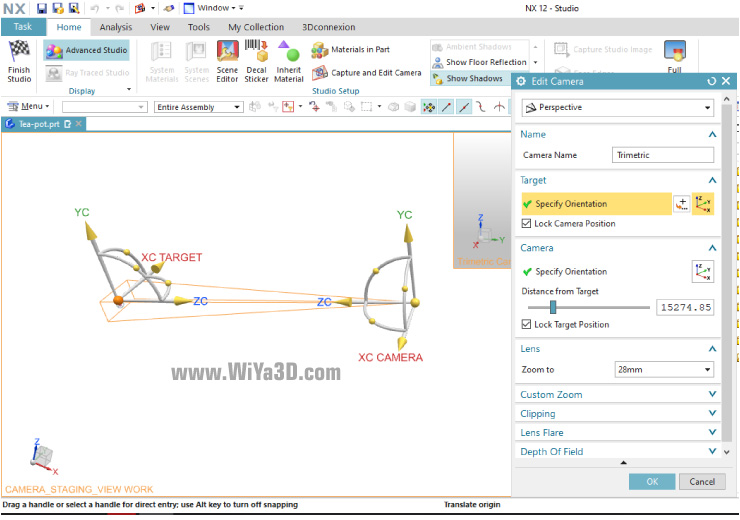
Capture & Edit Camera
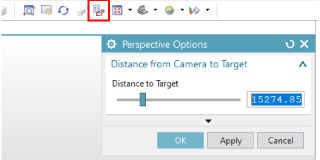
This feature allows toggle the model between parallel & perspective projection. Which allow dynamic perspective to background. From “Distance from Camera to Target” slide can used to specify require perspective view and position.
Or you can use following small icon to control
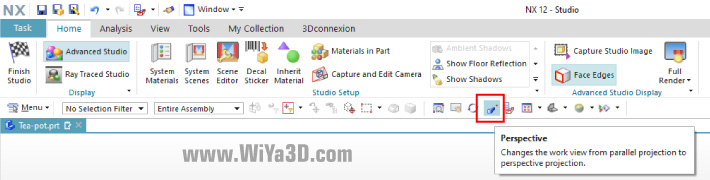
Perspective
Allow user to toggle the model between parallel & perspective projection.
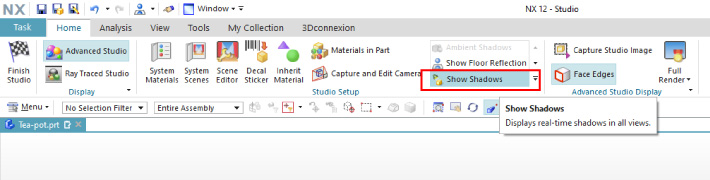
Show Shadow
This feature help to show the real time shadow
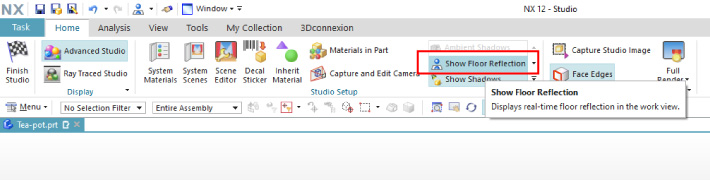
Show Floor Reflection
This feature show real-time floor reflection in the window/scene
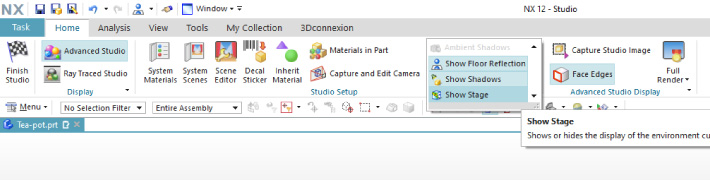
Show Stage
This feature allows the toggle the display of environment ON/Off. The environment is model part surrounding wall and floor
Ambient Shadow
This feature creates the shadow that are created from ambient light. With the ambient shadow corners of the model part shown as bit darker. This option only activates when the Advanced Studio Display is activated.
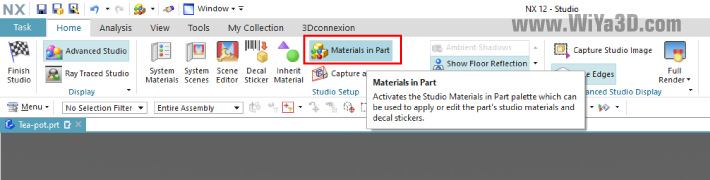
Materials in Part
This feature allows to see what are the current material/texture applied for the model.
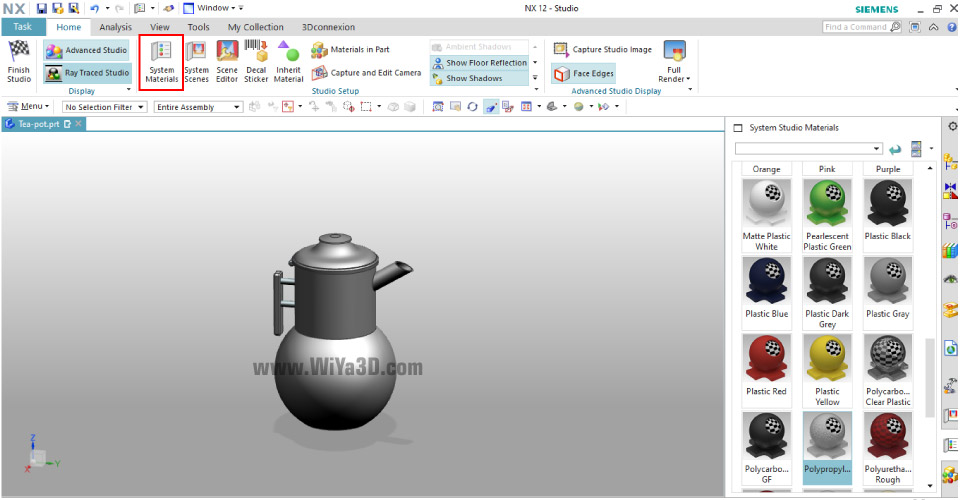
System Material
This feature allows user to select & apply the system material to model part/faces. Also it’s bring up material/texture dialog to customize any of the selected material from system material menu.
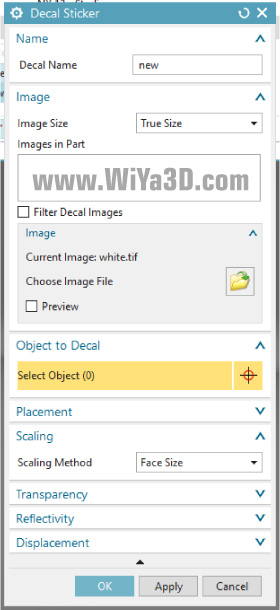
Decal Sticker
This feature allows to apply decal to body/face of the model. And with setting you will be able to control type(TIF,JPEG &,PNG) of decal, position/placement, scale, illumination & transparency of decal to a model.
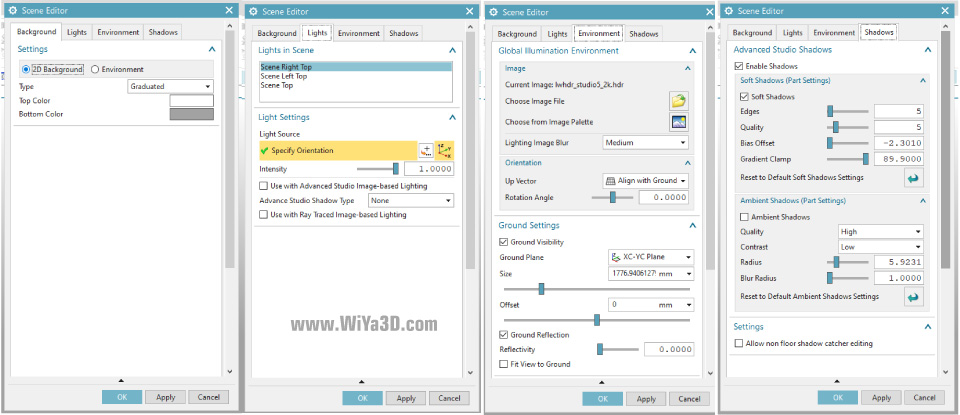
Scene Editor
This feature provide the option to controll most important setting up for the render image.Which are,
- Background
- Stage
- Lighting
- Reflection
- Global Illumination
- Shadow
Having knowledge of basic image rendering and tweaking these setting you will be able to get perfect render image.
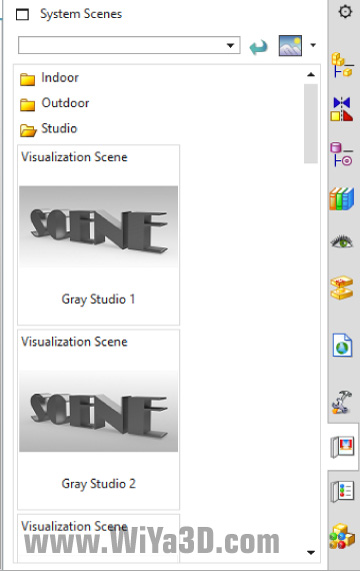
System Scene
This allow to select visualization scene for the display. Th selected scene can be applied to the background of the model part. It’s also allows user to import third party scene or develop own background for the rendering model.
Advance Studio Display
This feature display the image in real time that with setup materials, lighting, shading, reflation and background that you have so far set.

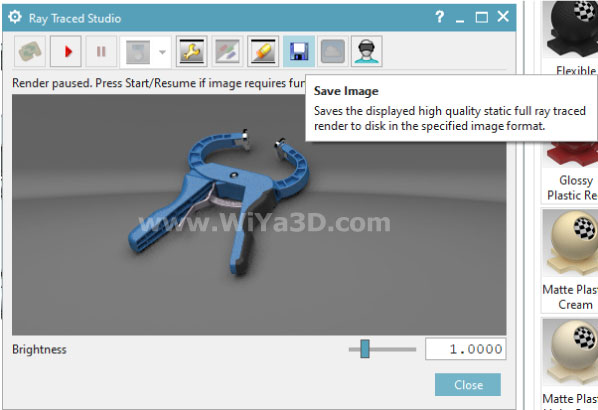
Once all the necessary settings are done, try render out the image by clicking Ray Traces Studio. In that opening window you can Stop/Pause at anytime and tweak or update any of setting of lighting, background, perspective/placement, material shadow until satisfactory level. And create the most realistic render image with Siemens NX visualization.
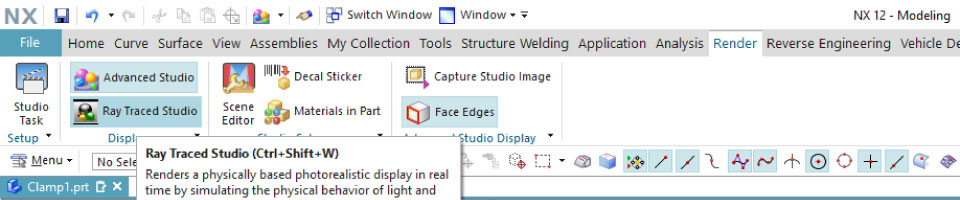
Ray Traced Studio
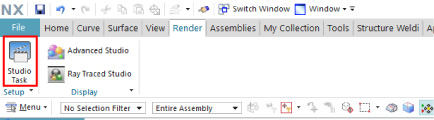
Go to Render Tab Select the Ray Traced Studio
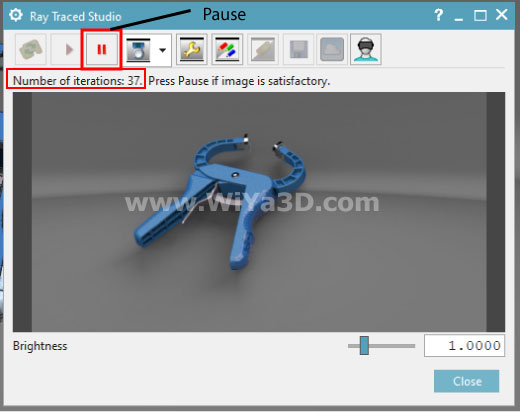
Then new window pop up and allow the photorealistic rendering of the part model with changes that you change in scene.

Image rendering is iterative, and number of iterations show display below. At any time user can pause rendering with satisfactory or until scene edit and again resume the rendering.
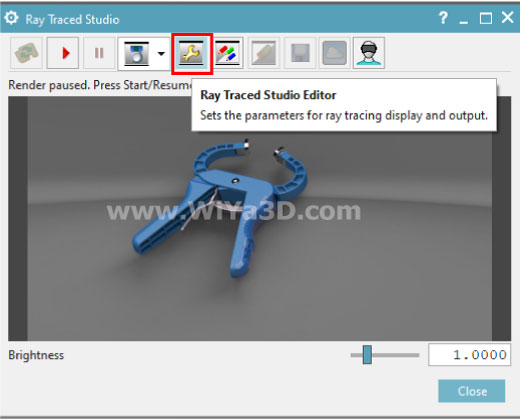
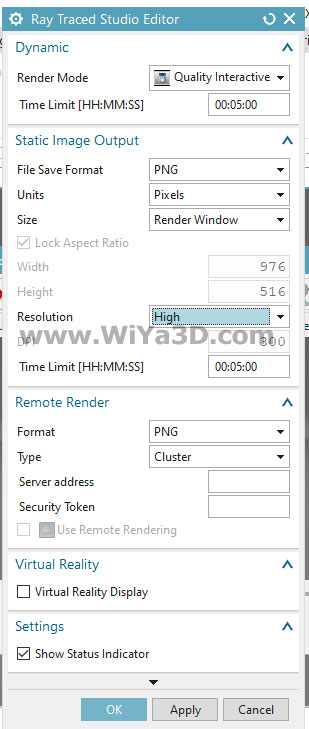
Ray Traced Studio Editor
Rendering time limit can be set in “Ray Traced Studio Editor window
The default time value is 5 min, you can set rendering stop time limit to automatically stop the rendering.
Also same window allow setting up the output image format, resolution. Instead of using local resources to render it can be set-up remote server machine for rendering.
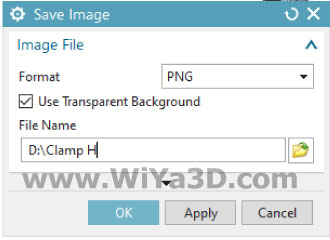
Save Image
Save operation in Ray Traced Studio Dialog allow to select image format and save as image background removed.
Save the image in desired location
We are planing to release next NX visualization article, which is describing key setting in depth to archive better render images.