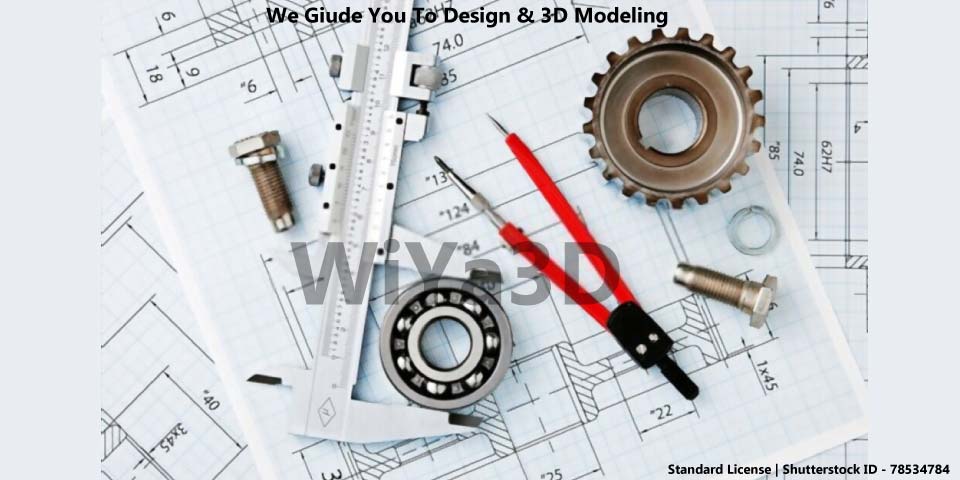
When rendering 3d model for render image it needs to understand the purpose of that image. Once design & 3d modeling complete the part/or assembly you have to decide what is the purpose of render images
-
Represent specific functionality
-
Concept product design & presentation purposes
-
Marketing purposes
-
Visualize the real-life product appearance,
Whatever the rendering image purpose, following four factors need to consider generating render image and convey to client/customer/supplier.
-
Lighting
-
Shading
-
Color & Materials
-
Scene Placement & Perspective View
What Is Photorealistic Image Rendering
The term Photorealistic Rendering represent the rendered 2D/3D image, which is close to the real world photo or visible appearance. Basically, Image synthesis or rendering refers to the automated operation of producing a photorealistic picture from either a 2D or 3D figure using computer programs.
For the rendering images, which are present shown this article are generated with KeyShot. Keyshot is sole great rendering and product animation video making software.
01. Lighting
Basically, Lighting helps to see what’s the product/view looks. Lighting is advance subject, however here we are stating basic things that anyone need to setting up the lighting. When setting the lighting it’s need to consider
-
Light source – Point, Directional, Spotlight, Ambient, …
-
Light Direction
-
Light Color
-
Light Intensity

a. For better outcome, lighting the model need to suit with situation. Suppose you are only trying to convey specific area/texture of the model. Then focus the light to that area rather than entire model area. Because it is always taking time to render image and try to focus on the showing aspect.
b. Also don’t try to over-light the model all around model/material or texture. Which makes to reduce unnecessary rendering/time. Start with less light and increase to showing of the satisfactory area that focusing on specific area/texture
c. If you are trying to render the model for finish realistic view, then light the model with photorealistic render setting for the lighting to convey effect in images. Normally all the image rendering software provide pre-setup photorealistic image rendering setup to use during the process.
01.d. When setting background for lighting setup, keep in mind don’t fill the model/parts all over the hole background. And try to focus one product assembly/part are withing the single render image. This will help reduce image light reflection effect on background and causing wash out effect on some model parts.
02. Shading
Shading effect use to provide model depth and 3d effect. Simply if your rendered image doesn’t include shading, then render model looks like 2d or flat appearance. For proper render image you have to control the shadow/color.
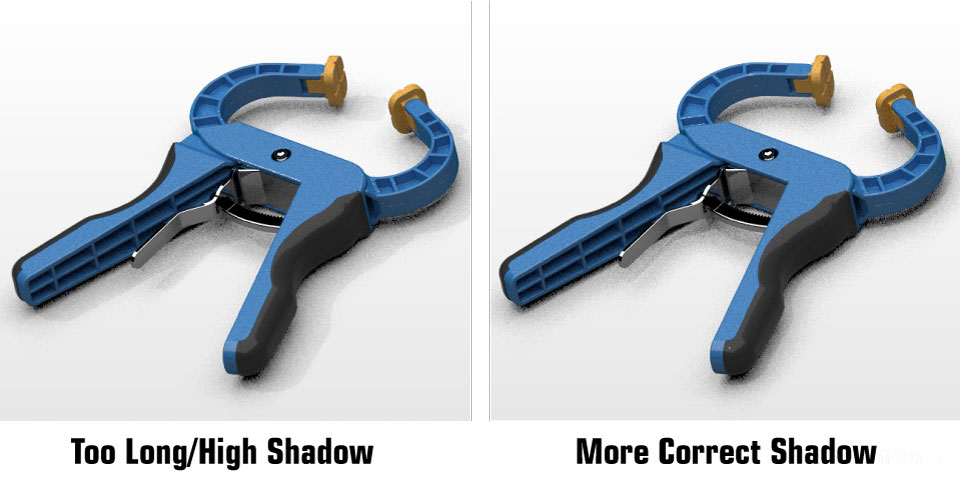
a. Focus on ambient shadow effect. Which fill the corners within the model part. That ambient shadows corners are darker
b. control the shadow length. This shading/or shadow need to short and slightly offsetting to the model part. That way you can produce photorealism render images
c. If you are using more than one shadow effect make sure they don’t compete with each other or model part itself.
d. Shadow shouldn’t be too dark or black. Try to refer the real photographs before setting up the shadow to understand and compare.
03. Color & Materials
Material/Texture & Color make the rendering more realistic. When you are adding material/texture and color.
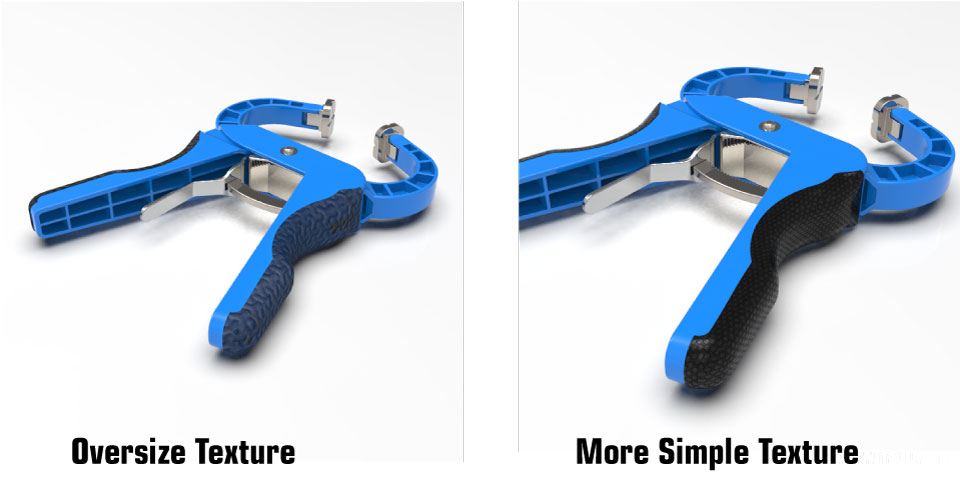
a. Apply the material type and texture pattern by refereeing real product to make the render image more realistic.
b. Select the more appropriate color for the model/part and it’s function. Try not to include company/corporate branding colors for proposal or presentation purposes. Which break the product realistic appearance
c. When using texture/bump pattern, don’t use oversize of them always try to keep simple.
d. Color should complement the part while material/texture should represent their function. Hence be aware of color & materials on how they reflect or act in scene.
04. Scene Placement
Placing the model in the correct scene and proper angle is crucial for realistic image and convey the product idea to audience.
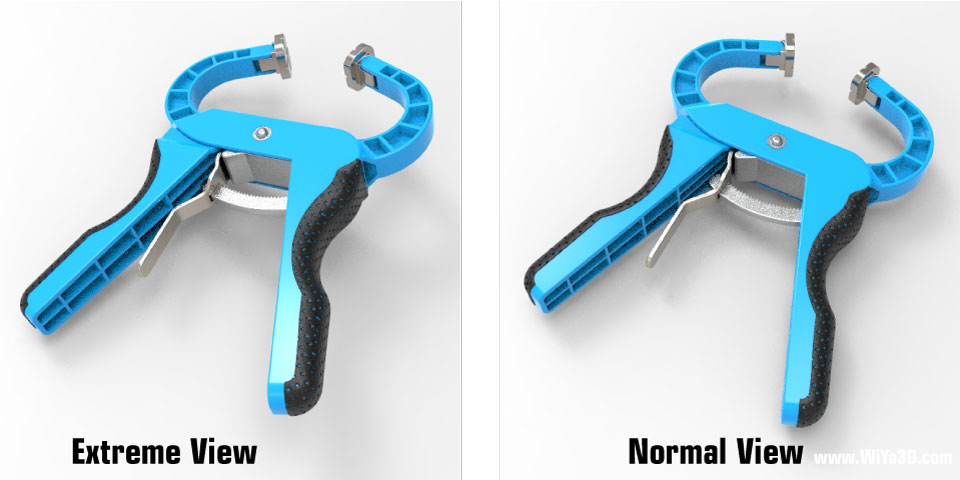
a. When placing the model in scene the perspective view should be within the normal view to average eye. And it shouldn’t be extreme.
b. The background/scene should use as frame to model. And shouldn’t appear or surround the whole model.
c. Always use relevant background, in relation to model/product & functional idea. If the model is manufacturing part try to use factory environment as background scene.
d. If you cannot find most relevant background , it’s advisable to use plain or simple plain background for rendering.
e. Try to focus on model/product rather than company name/logo if you ask to include in render images.
Different software/packages cater to different workflow demands. There are several packages in the market, but only a few are regarded as industry standards. Below are a few of the best software/packages for 3D image rendering.
The Best Image Rendering Software/Packages
Autodesk 3ds Max
Autodesk 3ds Max is an amazing 3D computer graphics software. The program gives solutions to motion animation, scene design, and architectural visualization. One thing you should keep in mind when dealing with this package is that it must be used on the Microsoft Windows platform. It might not be the best for a single task but can get anything done.
Autodesk 3ds Max comes with a free student edition!
Autodesk MAYA
Autodesk MAYA also powerful software with image rendering capability apart from 3D Computer animation, modeling & simulation. After complete the model design either within MAYA platform or by importing model, the basic rendering process start with shading & texturing the model/object. Then you have to add light setup, camera setup to the scene. Finally with few sample iteration and modifying the scene and all setting finally you will be able to render the highest quality render image for the desired scene.
Autodesk MAYA also comes with a free student edition!
Blender
It would excite you to know this package is open-source and free to use. One of the reasons why it’s free is that the support comes from a great community of software artists and developers. With a tremendous in-built ‘Cycles’ render engine, nothing beats this powerful suite of its animation tool. Blender covers almost all 3D modeling, animation & rendering capabilities, with impossibilities of complex projects.
The speed is slow, thanks to its open-source. However, an enterprise 3D package can handle anything coming its way.
Cinema 4D
This Cinema4D product from Maxon continues to impress. Cinema 4D meets the specific demands of 3D artists which is a plus. When you are dealing with smaller photorealistic image rendering, then this is the software for you.
Cinema 4D is, however, not suitable for rendering images such as construction projects, forests, or large architectural scenes. It excels in developing rapid-development processes and organic models courtesy of its in-built render engine.
A student free edition is available.
Houdini
Houdini is modeling, animating & rendering software package. It’s more capabilities lies with more in fluid, particle, cloth animation with great power. However withing the your project you will be get quite high quality render image as you expected.
Conclusion
Choosing the best software/package for your 3D, image rendering is not make process complete. That you need to know basic idea of getting basic render image correctly before go for advance render images like photorealistic image rendering.