• About Us
  • Privacy & Policy
  • Forum Rules
  • Contact Us
Saturday, May 17, 2025
  • Login
  • Register
  • Home
  • Product Design
  • Categories
    • Latest CAD Technology
    • Engineering CAD Design
    • Design & 3D Modeling
    • 3D Modeling & 3D Creation
    • Design Tips & Guide
    • Product Design
    • 3D Rendering
    • 3D Animation
    • Architectural Design
    • Rapid Prototyping
    • 3D Printing
    • FEA & Engineering Simulation
    • Reverse Engineering Design
    • 3D Scanning
    • CNC & CAM Programing
    • Manufacturing Design
    • Manufacturing
    • Material Selection
  • CAD Forum
    • Forum – Engineering Design
    • Forum – 3D Modeling & 3D Creation
    • Forum – 3D Scan & Reverse Engineering Design
    • Forum – FEA & Engineering Simulation
    • Forum – Architectural Design
    • Forum – Prototyping & 3D Printing
    • Forum – CNC / CAM Programming
    • Forum Rule
  • Privacy Policy
  • Contact Us
No Result
View All Result
CAD Forum
  • Home
  • Product Design
  • Categories
    • Latest CAD Technology
    • Engineering CAD Design
    • Design & 3D Modeling
    • 3D Modeling & 3D Creation
    • Design Tips & Guide
    • Product Design
    • 3D Rendering
    • 3D Animation
    • Architectural Design
    • Rapid Prototyping
    • 3D Printing
    • FEA & Engineering Simulation
    • Reverse Engineering Design
    • 3D Scanning
    • CNC & CAM Programing
    • Manufacturing Design
    • Manufacturing
    • Material Selection
  • CAD Forum
    • Forum – Engineering Design
    • Forum – 3D Modeling & 3D Creation
    • Forum – 3D Scan & Reverse Engineering Design
    • Forum – FEA & Engineering Simulation
    • Forum – Architectural Design
    • Forum – Prototyping & 3D Printing
    • Forum – CNC / CAM Programming
    • Forum Rule
  • Privacy Policy
  • Contact Us
No Result
View All Result
We Are 3D
No Result
View All Result

PhotoView 360 SolidWorks Model Rendering

in 3D Rendering
Reading Time: 5 mins read
A A
PhotoView 360 SolidWorks Model Rendering

Photoview 360 solidworks add in allow user to create the photorealistic rendering quickly to see the appearance that model/part inside the solidworks. With photoview 360 user can apply,

Benefit of Photoview 360

  • Apply Appearance – Color, Texture, Illumination
  • Apply Scene – Controlling the model surrounding, background
  • Applying Decals – Adding logo, label, sticker, instruction details
  • Preview the Image before final render
  • Controlling the rendering time or schedule
  • And saving the most know/best setting for future usage

Lets see how the rendering setting are done in photoview 360 for selected models.

SolidWorks Photoview 360 S001

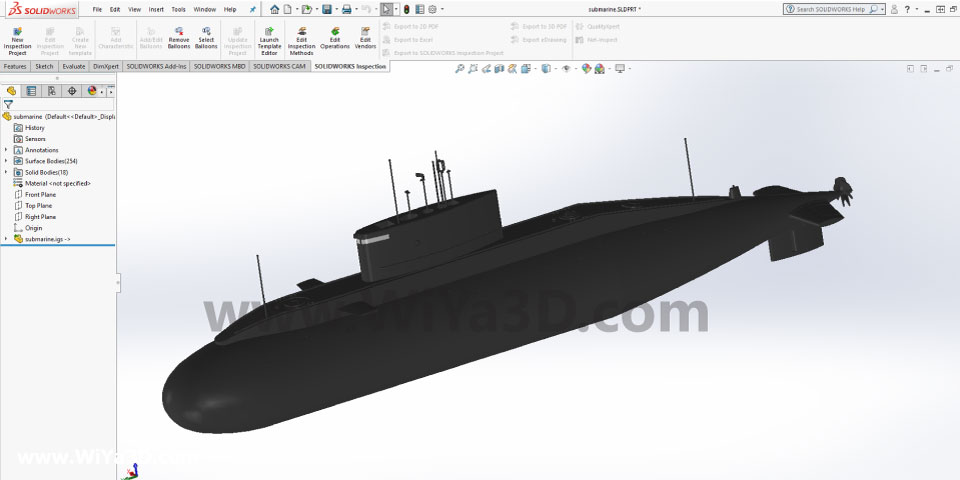
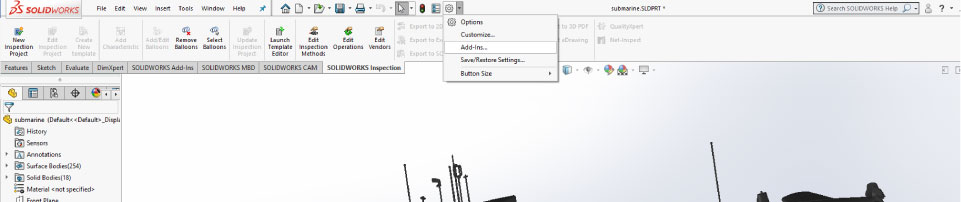
Open the solidworks model and go to “add-in” in order to activate the photoview 360

SolidWorks Photoview 360 S002

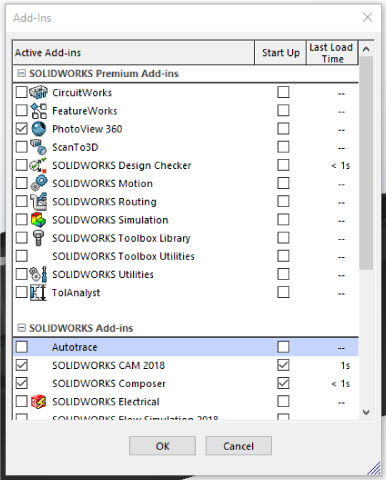
Tick the Photoview 360 and click ok to activate the photoview features

SolidWorks Photoview 360 S003

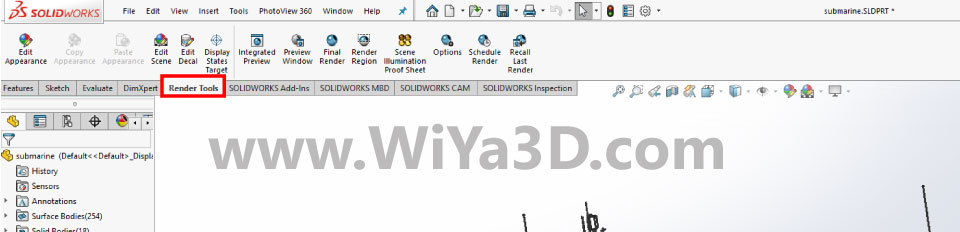
Now the Render Tool bar is activated and appear inside the SolidWorks
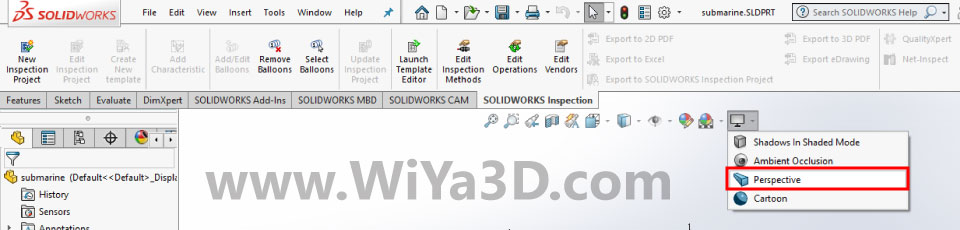
SolidWorks Photoview 360 S004

Apply Perspective

First thing in archiving better rendering is applying “Perspective”, which will make the model more realistic.

View Drop Down -> Perspective

SolidWorks Photoview 360 S005

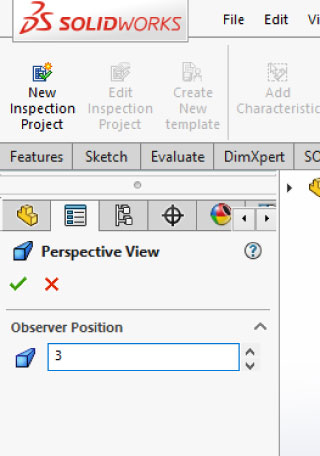
If you want to modify the perspective view, in order to make model closer or further away

Go to View Menu Bar – Modify – Perspective,

When you set larger number, you are closer and smaller numbers further away you are

SolidWorks Photoview 360 S006

SolidWorks Photoview 360 S007

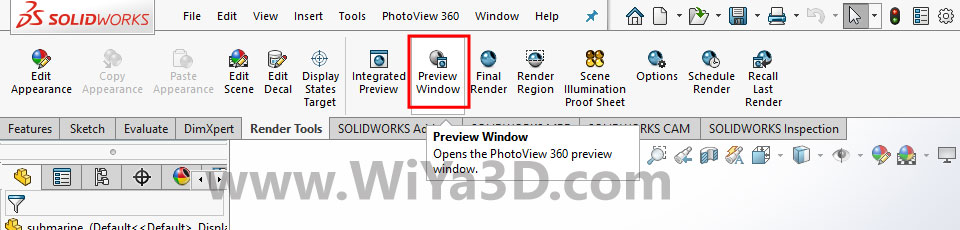
Open the Preview Window

Then you can activate the preview window in photoview 360, which allow user to see appearance of the models what’s look like

SolidWorks Photoview 360 S008

SolidWorks Photoview 360 S009

Apply the Background

To apply background image t the part model,

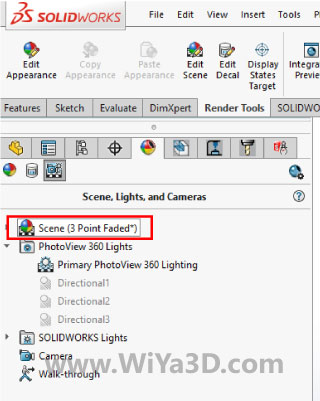
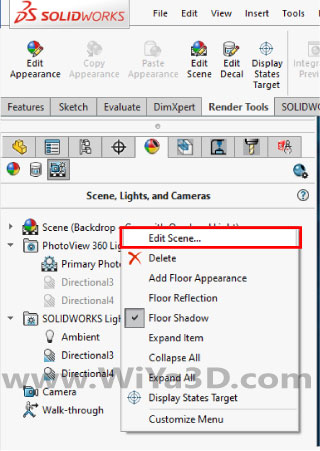
Go to ‘Display Manager’ – and click the “View Scene, Light & Camera”

SolidWorks Photoview 360 S010

Double click the scene option

SolidWorks Photoview 360 S011

SolidWorks Photoview 360 S012

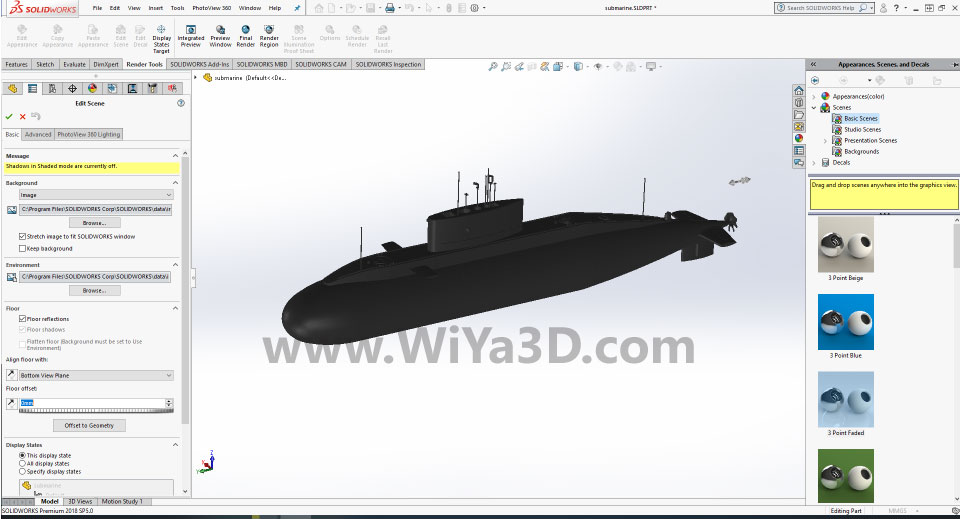
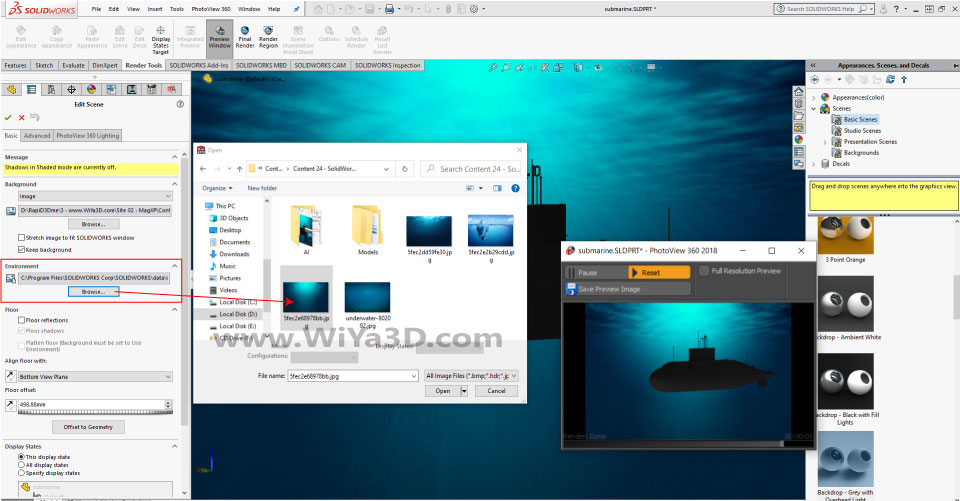
Select the background image option from drop down. You may change the background color from this section also instead of already available image

SolidWorks Photoview 360 S013

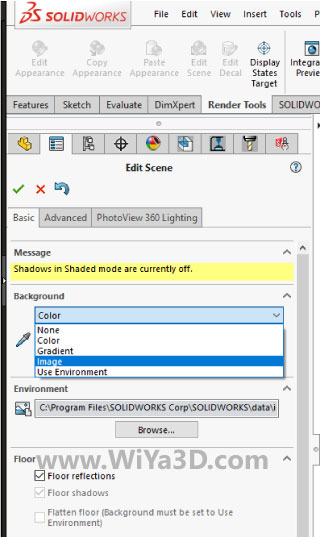
Browse for desired background image and apply the background.

SolidWorks Photoview 360 S014

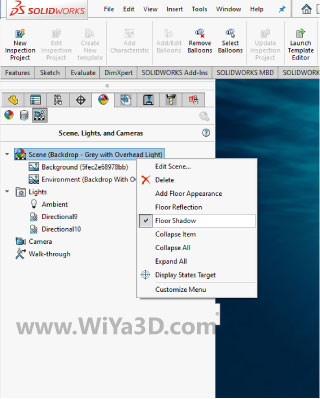
If you have floor shadow toggle on/off by right clicking scene

SolidWorks Photoview 360 S015

Control Appearance 

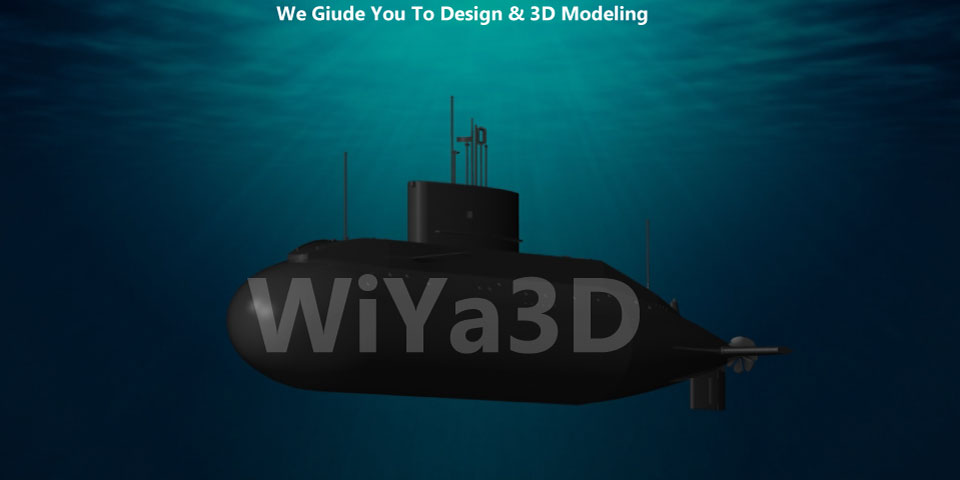
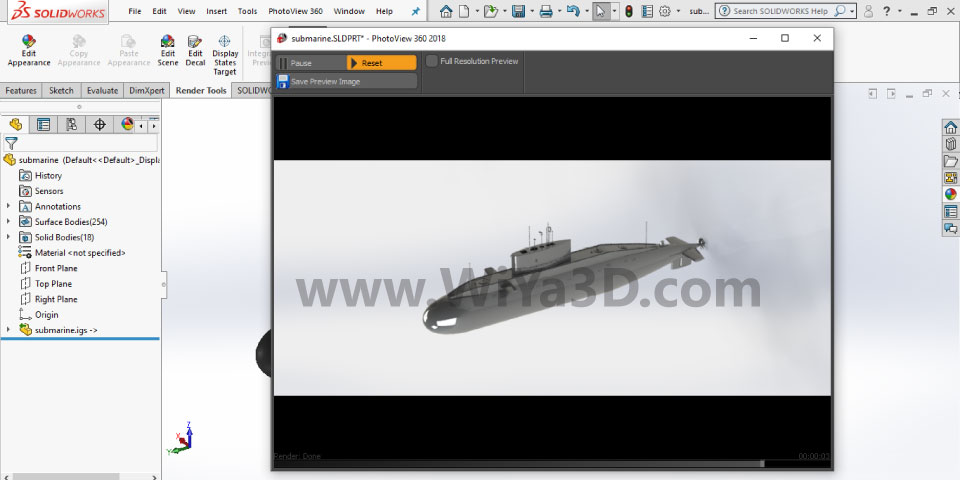
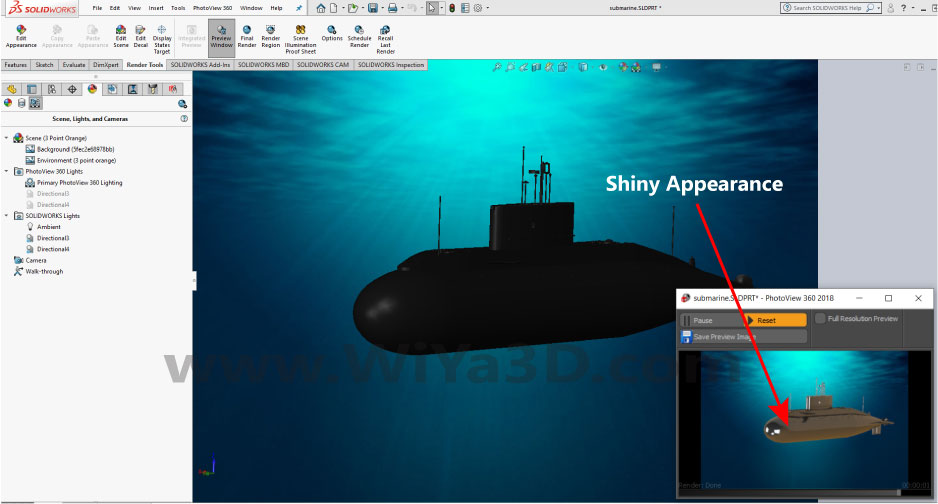
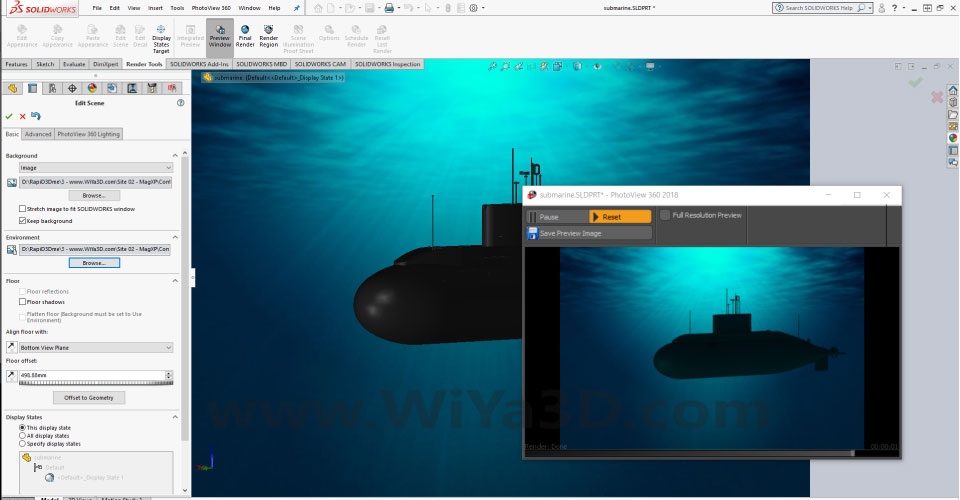
In preview window you see that, the model (Submarine) appear as shining object. Here we need to control the shininess of the model part depending on the rendering image object/purpose. Also need to give some darkness that to show underwater effect/appearance to submarine. All these setting change in Display Manager

SolidWorks Photoview 360 S017

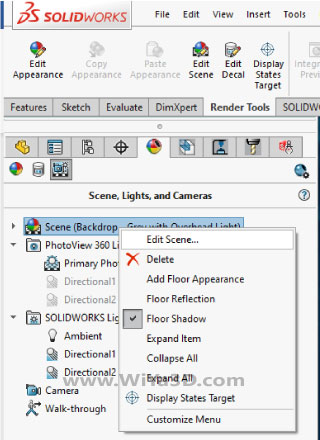
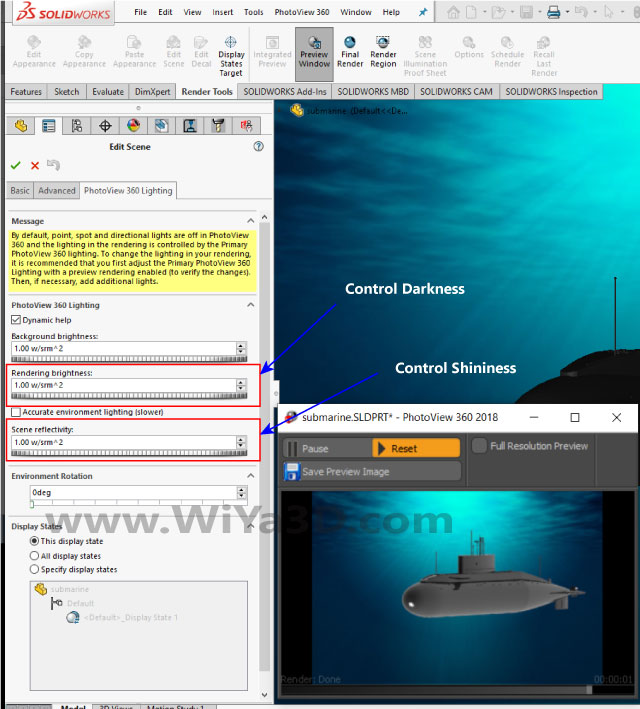
Go to DisplayManager -> Appearance – > Right Click Scene -> PhotoView 360 Lighting

  • To control shininess appearance, change the “Scene Reflectivity”
  • To control darkness, change the “Rendering Brightness”

SolidWorks Photoview 360 S018

SolidWorks Photoview 360 S019


Apply Environment 

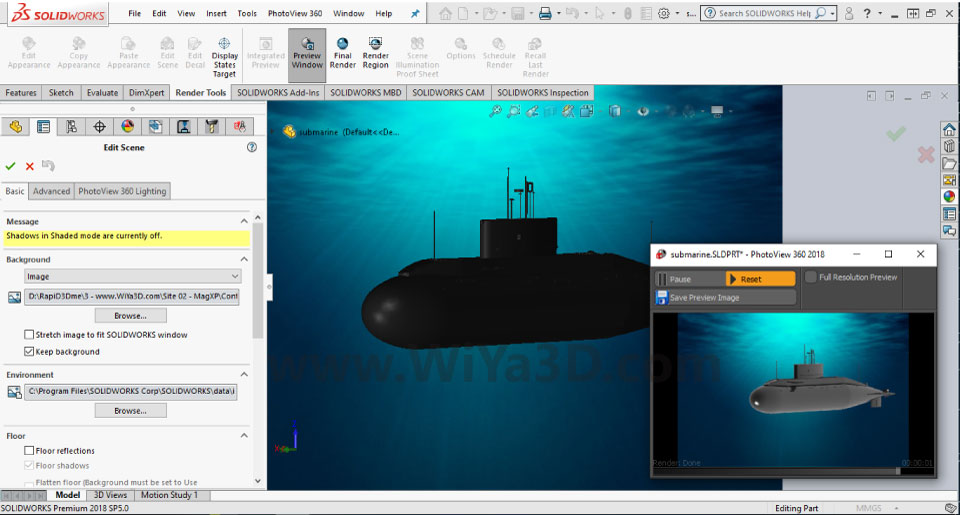
In this case the submarine model in deep sea and it should represent the blue sea effect cast into the body. To do that, double click the scene again and click “Edit Scene”. Then apply the same underwater image for the environment.

SolidWorks Photoview 360 S022

SolidWorks Photoview 360 S023

SolidWorks Photoview 360 S024

Apply Lighting

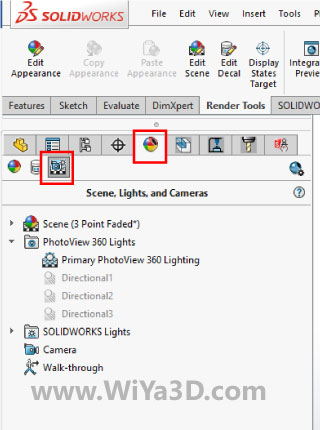
Then we have to setup the lighting based on the model & scene. However you noticed that quite lighting in graphics area. The reason is two different lighting is supply to the model. One is SolidWorks default lights and second one is Photoview 360 lighting

SolidWorks Photoview 360 S016

In display manager toggle on the photoview 360 lighting. Depending on the requirement, can use single or multiple lights for the rendering.

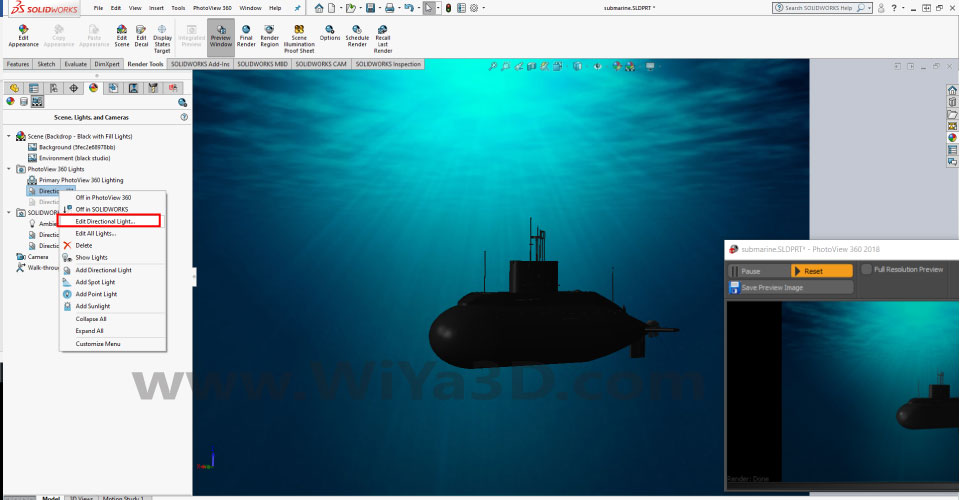
Right Click one light of photoview 360 and click ON

SolidWorks Photoview 360 S025

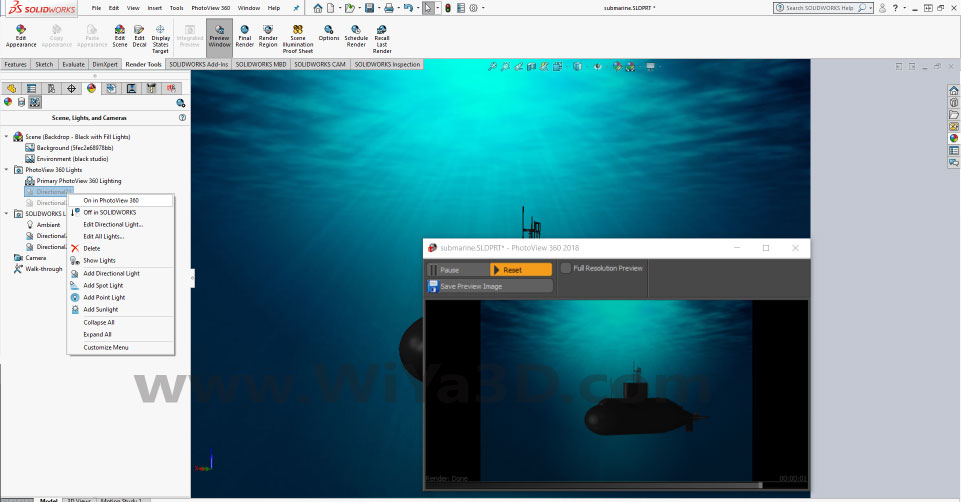
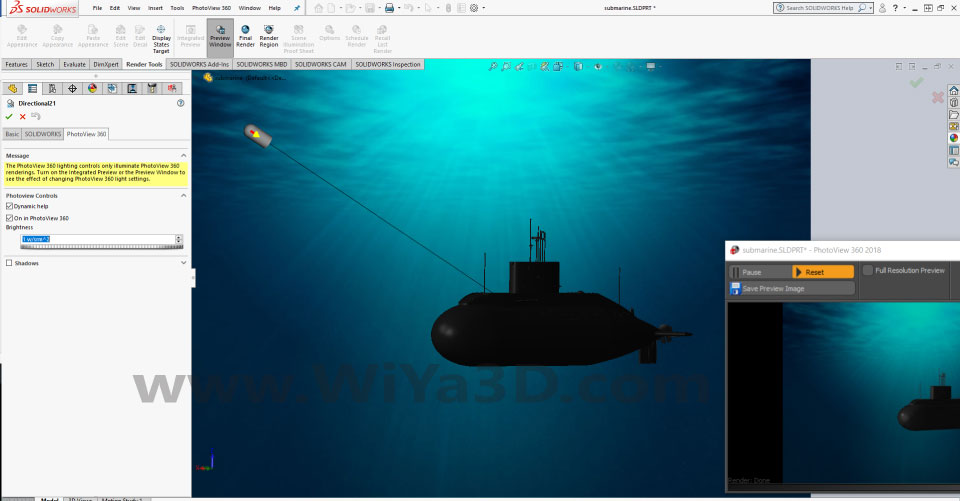
Right click on the toggle ON photoview 360 light and click “Edit Directional Lights” to customize the lighting direction. Also, there you can edit the light brightness. By looking at preview window, designer can define best light direction & brightness for the render model

SolidWorks Photoview 360 S026

SolidWorks Photoview 360 S027

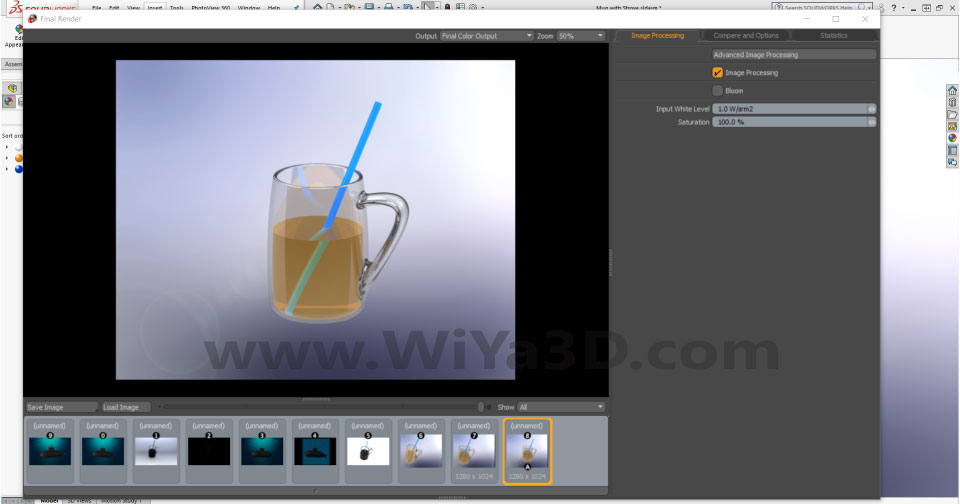
If everything setup, you can do a final render.

SolidWorks Photoview 360 S028

SolidWorks Photoview 360 S029

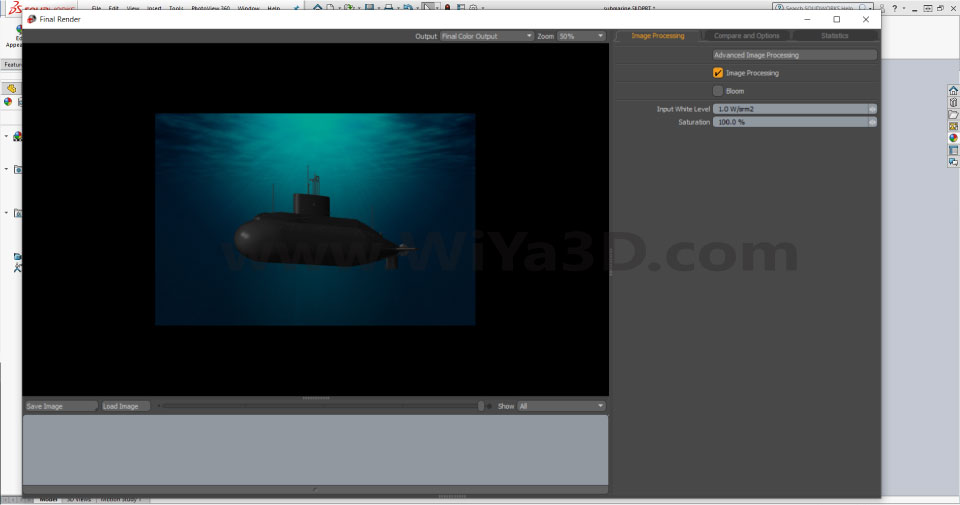
With few iterations you will be able to get pretty good rendering by playing with background image, lighting & environment.

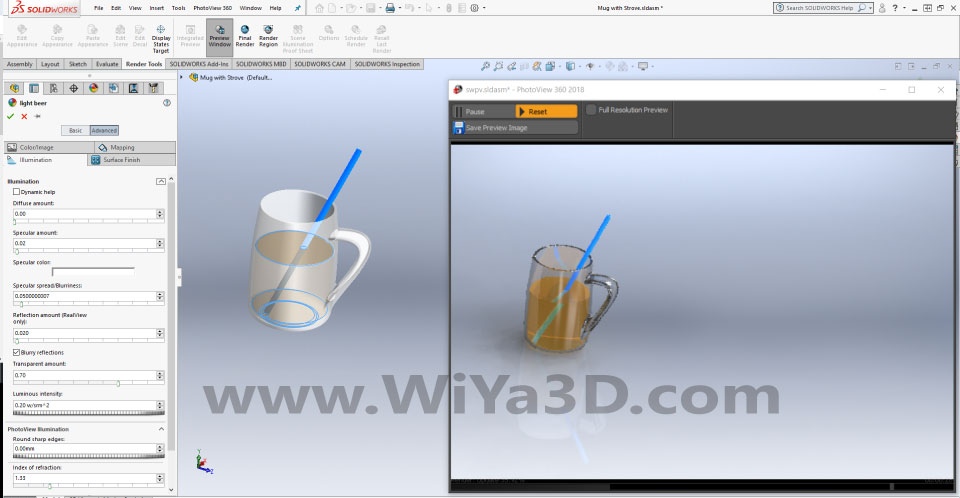
Lets try rendering another model that include caustic effect. Here we going to render the model that include drinking juice inside cup with strove

Import the model and setup the basic appearance.

  • Mug – Glass Appearance
  • Strove – Plastic Strove
  • Juice – any color drinking juice

SolidWorks Photoview 360 S031

SolidWorks Photoview 360 S032

SolidWorks Photoview 360 S033

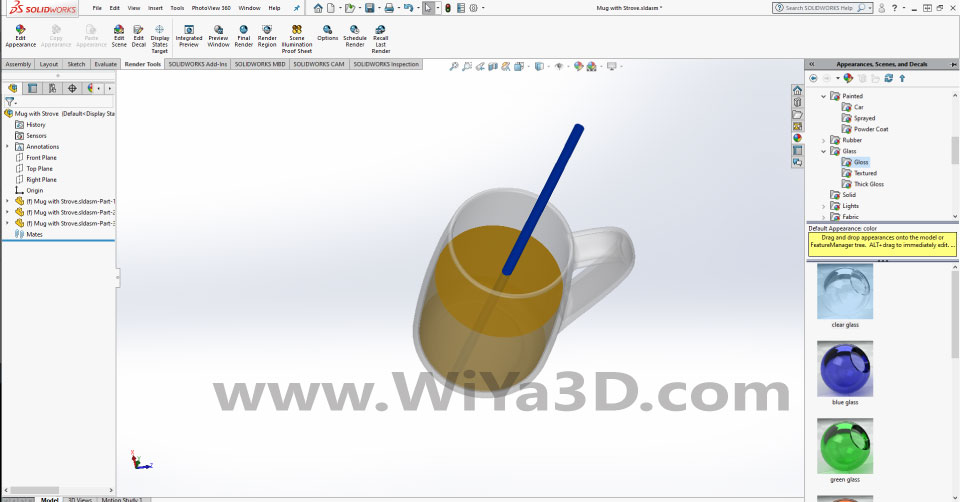
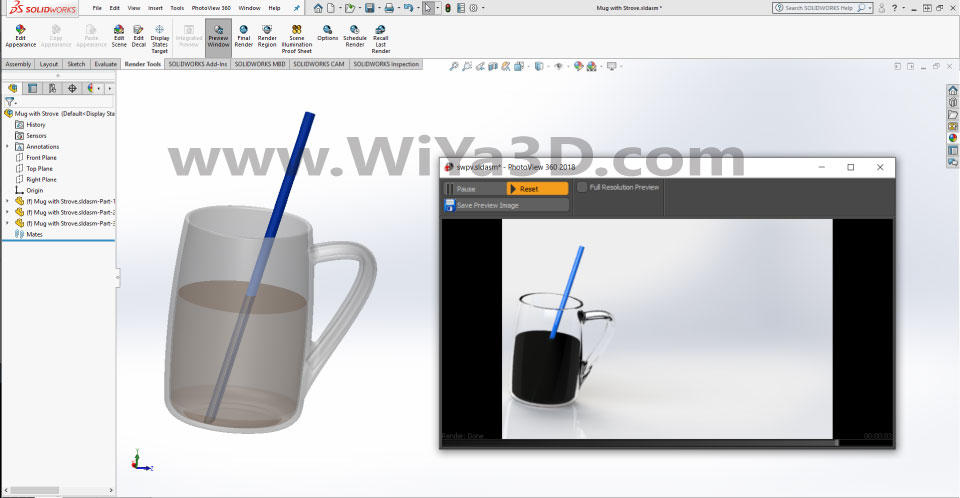
Sometimes you encounter that inside liquid is not properly appear. Which instead on real liquid view it will appear as black color. In order to resolve these, you have to play with glass mug and liquid assembly, each material/colors illumination setting.

SolidWorks Photoview 360 S035

SolidWorks Photoview 360 S036

Tags: PhotoView 360PhotoView 360 Image Rendering TipsSolidWorks PhotoView 360

Related Posts

Image Rendering Guide/Tips
3D Rendering

Image Rendering Guide/Tips

January 7, 2024
Siemens NX Visualization – Studio Task Image Rendering
3D Rendering

Siemens NX Visualization – Studio Task Image Rendering

January 7, 2024
Load More
Please login to join discussion

Latest Post

Convert STL to Solid Body

December 31, 2024

Alternative for Geomagic Design X

December 31, 2024
Best Monitor Setup for CAD Engineers and 3D Modelers: Size, Panel Types, and Key Features

Best Monitor Setup for CAD Engineers and 3D Modelers: Size, Panel Types, and Key Features

September 5, 2024
Best Processor for CAD Modeling: A Guide to Intel, AMD Ryzen and Apple CPUs

Best Processor for CAD Modeling: A Guide to Intel, AMD Ryzen and Apple CPUs

September 3, 2024
3D Mesh Modeling vs. Engineering CAD Modeling: Key Differences and Best Software

3D Mesh Modeling vs. Engineering CAD Modeling: Key Differences and Best Software

September 1, 2024

About Us

We bring you the best CAD related information and knowledge. As a engineering team, which mainly in the field of Mechanical, Manufacturing, Product Development, Industrial,& Architectural. Our aim is share our experience on design & 3D modeling fields and give chance to everyone to get benefit of it.
Read More

  • Home
  • About Us
  • Contact Us

Copyright © 2019 - 2024 WiYa3D.com All rights reserved. Unauthorized reproduction or linking forbidden without expressed written permission. Registration on or use of this site constitutes acceptance of our Privacy Policy / Forum Rule & Posting Policies

Welcome to WiYa3D...!

Login to your account below

Forgotten Password? Sign Up

Create New Account!

Fill the forms bellow to register

*By registering into our website, you agree to the Terms & Conditions and Privacy Policy.
All fields are required. Log In

Retrieve your password

Please enter your username or email address to reset your password.

Log In
No Result
View All Result
  • Home
  • About Us
  • Categories
  • Privacy Policy
  • CAD Forum
    • Forum – Engineering Design
    • Forum – 3D Modeling & 3D Creation
    • Forum – 3D Scan & Reverse Engineering Design
    • Forum – FEA & Engineering Simulation
    • Forum – Architectural Design
    • Forum – Prototyping & 3D Printing
    • Forum – CNC / CAM Programming
  • Contact Us
  • Login
  • Sign Up
This website uses cookies. By continuing to use this website you are giving consent to cookies being used. Visit our Privacy and Cookie Policy.